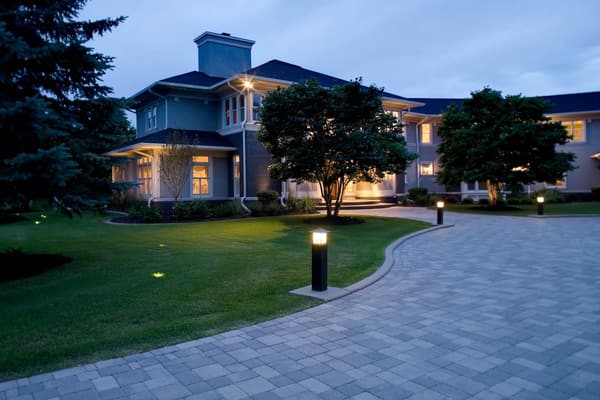
Stepping out onto your back patio after sunset often means staring into a pitch-black void where your stone walkways and oak trees completely disappear. Flipping on a harsh security floodlight only makes things worse by blinding your guests and washing out the natural beauty of your yard. Installing low voltage landscape lighting solves this frustration by turning dark, hazardous walkways into warm, welcoming outdoor living spaces. When your yard has balanced illumination, you gain safe footing on every stair and a great view from your indoor windows without annoying the neighbors.
Finding the right fixtures and calculating wire runs does not have to feel like studying for an electrical engineering exam because the team at Bjorn's has already mapped out the entire process for you. Below, we break down everything required to build a reliable outdoor lighting layout, from choosing weatherproof brass hardware and preventing voltage drop to layering light beams and connecting smart home controls.
Upgrade Your Outdoor Living Space With Bjorn's
Transform your yard after dark with commercial-grade outdoor fixtures, smart automation controls, and custom system design from our local specialists.
Key Takeaways
- Safe Step-Down Power: A 12V to 15V system uses a multi-tap transformer plugged into an outdoor GFCI outlet to step down standard 120V household power into safe, shock-resistant current.
- Balanced Three-Layer Design: Combining task, ambient, and accent lights with warm 2700K to 3000K color temperatures creates visual depth and avoids a flat, washed-out yard.
- Voltage Drop Prevention: Pairing 12/2 or 10/2 direct-burial copper cable with a center-fed T-method wiring layout keeps distant fixtures just as bright as the lights closest to your power source.
- Smart Zone Control: Modern astronomical timers and Wi-Fi transformers let you group curb-appeal, patio, and perimeter security lights on separate schedules tied to your whole-home automation system.
Build a Reliable Outdoor Lighting Foundation with the Right Hardware
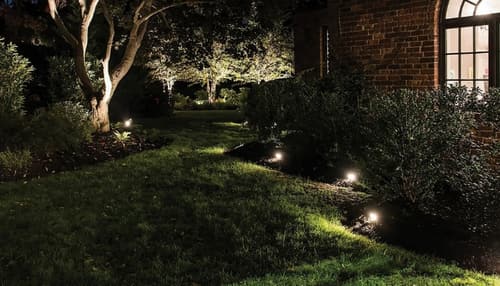
A dependable outdoor lighting system starts at your exterior wall before a single fixture goes into the dirt. Standard household outlets supply 120V of alternating current, which is dangerous to run through shallow garden beds. A low voltage landscape lighting system plugs into a GFCI-protected outdoor outlet and steps that 120V household current down to a safe 12V to 15V current. This low-voltage power travels safely through underground cables without requiring heavy metal conduit or deep trenches.
Building a system that lasts through decades of Texas heat, heavy rain, and lawn maintenance requires four core hardware components:
- Multi-Tap Transformers: Stainless steel enclosures that convert 120V power into 12V to 15V channels while housing your timers and smart controllers.
- Direct-Burial Copper Wire: Heavy-duty, UV-resistant jacketed copper cable designed to handle underground moisture and soil acidity without corroding.
- Weatherproof Connectors: Silicone-filled wire nuts or mechanical brass clamp connectors that lock out water and prevent ground faults at every splice point.
- High-CRI Integrated LED Fixtures: Sealed outdoor lights with a Color Rendering Index (CRI) of 85 or higher that reveal the true, rich colors of natural stone and green foliage.
Sizing your 12V landscape lighting transformer properly protects your electronics from overheating and leaves room to add more fixtures later. Our appliance and smart home experts always apply the 80 percent capacity rule when planning a job. Add up the total wattage of every LED fixture in your plan and multiply that number by 1.25. If your yard lights draw 120 watts total, multiplying by 1.25 gives you 150 watts, meaning you should install at least a 150-watt or 200-watt transformer for safe thermal operation.
Skipping plastic big-box store kits saves you major headaches down the road. Cheap plastic stakes and thin aluminum housings crack under UV exposure, warp from string trimmers, and leak water after a single storm. Choosing commercial-grade solid brass, copper, or powder-coated cast aluminum fixtures with IP65 waterproof outdoor fixtures ratings (or IP67 for wet low spots) keeps water and dust out of the internal LED boards. Solid brass and copper actually develop a protective natural patina over time that blends right into your mulch beds.
Choose the Best Outdoor Power Source for Your Yard and Budget
Comparing your power options side by side makes it easy to see why low-voltage wired systems remain the gold standard for residential properties.
| Feature Dimension | 12V Low Voltage Systems | 120V Line Voltage Systems | Solar Landscape Lights |
|---|---|---|---|
| Power Source and Voltage | Plugs into a 120V GFCI outlet and steps power down to a safe 12V to 15V current. | Hardwires directly into your main 120V electrical panel with high-voltage current. | Relies on tiny onboard photovoltaic panels and AA rechargeable batteries. |
| Typical Lumen Output and Reliability | Delivers consistent 50 to 800+ lumens every night regardless of cloud cover. | Produces extreme lumen output suited for commercial parking lots and sports courts. | Outputs a weak 5 to 30 lumens that fades quickly on cloudy days or shaded paths. |
| Installation Depth and Permit Requirements | Requires a simple 6-inch slit in the turf with no electrical permits needed in most cities. | Demands 18-to-24-inch trenches, rigid conduit, licensed electricians, and city permits. | Pushes straight into soft dirt with zero wiring or permits required. |
| Upfront Cost vs Long-Term Value | Moderate upfront investment with decades of trouble-free service and replaceable LED lamps. | High upfront installation labor and material costs with expensive repair bills. | Cheap initial purchase price but high long-term cost because units fail every 1 to 2 years. |
| Smart Home and Zoning Integration | Connects directly with smart transformers, dimmers, and whole-home automation platforms. | Integrates with indoor smart switches but lacks flexible multi-zone low-voltage dimming. | Offers almost zero smart home integration or centralized scheduling control. |
| Lifespan in Harsh Weather | Lasts 15 to 25+ years when built with solid brass or copper IP65 housings. | Lasts 15 to 20 years if industrial seals and junction boxes are maintained. | Degrades in 12 to 24 months due to battery corrosion and cloudy plastic solar panels. |
When weighing low voltage vs solar landscape lights, wired 12V systems win on brightness, reliability, and architectural beauty every single time.
The Rule of Three: Layering Your Outdoor Lighting Layout
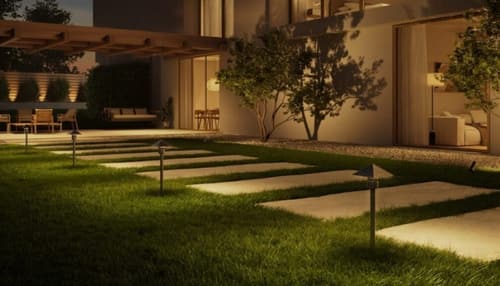
Designing an eye-catching yard after dark relies on the Rule of Three rather than blasting every tree with the same bright spotlight. Mixing three distinct layers of light creates natural contrast, guides guests safely across your property, and highlights your home's best architectural textures.
Task Lighting for Safe Footing and Cooking
Task lighting focuses strictly on safety and function where people walk, step, and gather. You use these fixtures to illuminate elevation changes on stone stairs, curve along concrete walkways, and brighten outdoor kitchen grill stations. Keep task fixtures subtle by choosing lower outputs between 35 and 100 lumens so the light stays on the ground rather than shining into people's eyes. Under-cap hardscape lights tucked beneath outdoor kitchen counters and stone steps work great for this layer.
Ambient Lighting for Soft Yard Perimeters
Ambient lighting fills in the background and establishes a welcoming mood across your outdoor seating areas and property lines. Mounting soft downward lights inside pergolas, along fence lines, or under second-story eaves gives your patio a gentle glow that mimics early twilight. Aim for moderate outputs between 100 and 200 lumens here to define the boundaries of your yard so your patio never feels like a small island surrounded by a dark abyss.
Accent Lighting for Focal Points and Depth
Accent lighting brings the drama by drawing the eye to specimen oak trees, stonework facades, statues, and spilling water features. Because these fixtures need to push light up tall trunks or across wide masonry walls, they require stronger outputs ranging from 200 to 600 lumens. Varying your lumen output between gentle 50-lumen path lights and punchy 400-lumen tree uplights creates depth and prevents your yard from looking flat or washed out.
Selecting warm white kelvin outdoor lights is just as important as picking the right lumen output. Always stay between 2700K and 3000K for residential yards. A 2700K lamp gives off a cozy, golden candlelight glow that flatters red brick, cedar wood, and warm sandstone, while 3000K crisp warm white makes green foliage and gray stucco pop. Save cool 4000K bulbs strictly for side-yard security zones or contemporary water features, as 4000K or 5000K light makes grass look dead and gives your home a cold, gas-station glare.
Following DarkSky International guidelines keeps your yard gorgeous without polluting the night sky or bothering your neighbors. Always outfit your directional spotlights with angled glare shields, hex louvers, or extended shrouds. Aiming fixtures carefully away from windows and street traffic protects your night vision while keeping every lumen focused on its target.
Essential Landscape Lighting Techniques and Fixture Selection
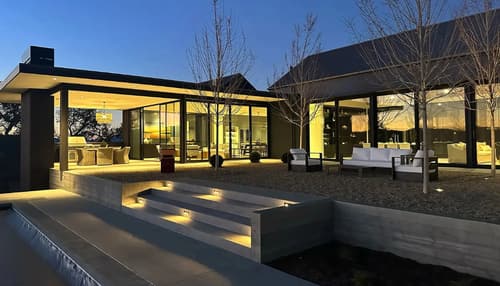
Knowing how to design landscape lighting means pairing the right fixture housing with the right placement geometry. Different areas of your yard call for specialized hardware built to shape light in specific ways.
Here is how professional designers match LED path lights and spotlights to specific yard features:
- Directional Spotlights: Best for uplighting tree trunks, architectural columns, and statues where you need a controlled cone of light.
- Wide Floodlights: Built with flat lenses to wash broad retaining walls, wide hedges, and multi-trunk crape myrtles with smooth, even illumination.
- Path Bollards and Hat Lights: Designed to cast a downward pool of light across gravel walkways, driveway borders, and low flower beds without upward glare.
- Hardscape Deck Lights: Compact linear bars with flat mounting brackets that slide directly under mortar caps on retaining walls, fire pits, and deck stairs.
- Recessed In-Ground Well Lights: Flush-mounted cylinders buried level with the grass to uplight trees or stone walls where lawnmowers need to roll right over the fixture.
Once you pick your hardware, applying five classic landscape lighting techniques brings your property sketch to life:
- Uplighting: Place directional spotlights 10 to 15 feet away from a tree trunk and tilt them at a 45-to-60-degree angle to illuminate both the bark structure and the lower leaf canopy.
- Grazing: Position well lights or narrow spotlights just 2 to 4 feet away from a rough stone wall or brick chimney and aim straight up to cast dramatic micro-shadows across the texture.
- Silhouetting: Hide a wide floodlight behind a dense Japanese maple or ornamental grass and aim it at an adjacent blank wall so the plant casts a sharp, dark outline against the bright background.
- Moonlighting: Mount weatherproof bullet lights 20 to 30 feet high inside the branches of a mature tree and point them downward through the leaves to create natural, dappled shadows across your lawn.
- Shadowing: Place a soft spotlight in front of a sculptural plant or trellis so it projects an enlarged, artistic shadow onto the wall directly behind it.
Spacing your pathway fixtures takes restraint. Lining up path lights in two straight rows directly across from each other creates an amateurish airport runway look. Instead, stagger your path lights 8 to 12 feet apart on alternating sides of the walkway. Letting small pockets of soft shadow fall between the pools of light guides the eye naturally down the path.
Pay close attention to beam angle geometry when ordering lamps for your spotlights. Use narrow spot beams between 10 and 25 degrees when shooting light up tall, skinny pillars or second-story dormers so the beam does not spill through bedroom windows. Switch to standard flood beams between 36 and 60 degrees when lighting wide oak canopies or broad stone facades from a closer distance.
The Pros and Cons of Low Voltage Landscape Lighting
Investing in a dedicated 12V outdoor system offers major advantages for home safety, curb appeal, and property value, though it requires more upfront planning than sticking solar stakes in the dirt.
Pros
Safe DIY and Pet-Friendly Voltage:
Stepping power down to 12V eliminates the risk of severe electrical shock if a dog chews a cable or a shovel nicks a wire while planting spring flowers.
High Energy Efficiency:
Modern integrated LED modules use 75 to 80 percent less electricity than old halogen bulbs, allowing you to run 20 fixtures all night for just pennies a day.
Flexible Fixture Repositioning:
Because low-voltage cable does not sit inside rigid metal pipes, leaving a small loop of extra slack at each base lets you move spotlights backward as your trees grow wider.
All-Weather Brightness:
Hardwired connections to your home's electrical grid guarantee full lumen output through winter freezes, week-long rainstorms, and shaded north-facing yards.
Cons
Higher Initial Hardware Cost:
Purchasing a stainless steel transformer, heavy copper wire, and solid brass fixtures costs significantly more upfront than buying disposable plastic solar lights.
Voltage Drop Math Required:
Long wire runs across large properties require careful wattage calculations and thicker wire gauges to keep distant lights from losing brightness.
Wiring Methods, Cable Gauge Math, and Preventing Voltage Drop
Understanding how to prevent voltage drop in landscape lighting separates a clean, professional installation from a frustrating weekend project. Voltage drop is the natural loss of electrical pressure as current travels down a copper wire and encounters resistance. On older halogen setups or cheap single-tap transformers, voltage drop makes fixtures at the end of the line look dim and orange, while overloading modern LED driver boards with low voltage causes them to flicker or shut off early.
Choosing the right wiring topology keeps voltage balanced across every fixture in your yard:
- Daisy Chain Method: Connects one fixture directly to the next in a single straight line, which works fine for short runs of 4 to 6 low-wattage LED lights.
- T-Method Layout: Runs a primary feed wire from the transformer directly to the middle of a lighting group and branches out in both directions, cutting voltage loss in half.
- Hub and Combination Method: Runs main feed cables to waterproof underground junction hubs where individual fixtures connect with equal-length wire leads, guaranteeing identical voltage at every lamp.
Checking a basic landscape wire gauge chart and running one simple math equation tells you exactly which cable thickness to buy. Multiply your Total Zone Wattage by the Cable Length in Feet to find your exposure number. For standard runs up to 100 feet carrying under 100 watts total, 12/2 AWG direct-burial copper wire handles the load easily. If your run stretches past 150 feet or carries a heavy wattage load across a big backyard, upgrade to thicker 10/2 AWG wire to cut resistance in half. Avoid thin 16/2 or 14/2 retail wire for main trunk lines, as thin copper starves distant fixtures of power.
When installing your cable, follow best practices for burying low voltage cable depth. Push a flat-blade landscaping spade 6 inches straight into the turf or mulch bed, rock the handle forward to create a V-shaped trench, tuck the wire to the bottom, and step the sod back down. Anytime your cable crosses under a future concrete sidewalk, paver patio, or driveway, run it through a 1-inch Schedule 40 PVC conduit sleeve so you can pull new wires later without jackhammering your hardscape. When tightening your waterproof connectors at each fixture, leave an extra 18-inch service loop of wire coiled beneath the mulch so you can easily shift the fixture as surrounding shrubs mature and spread out.
Understanding multi-tap transformer benefits makes balancing long yard runs effortless. Instead of offering only one 12V terminal block, a professional multi-tap unit includes 12V, 13V, 14V, and 15V output taps. If a 150-foot wire run out to your back property line loses 2 volts of pressure along the cable, you simply land that wire on the 14V tap inside the transformer so the fixtures at the end still receive a strong 12V supply.
Smart Outdoor Lighting Controls, Zoning, and Home Automation
Modern outdoor systems have moved far beyond clunky mechanical pin timers that drift off schedule every time the power blinks and basic dusk-to-dawn photocells that get tricked by porch lights. Upgrading to smart outdoor lighting automation puts your entire property on an intelligent autopilot that adjusts to the seasons automatically.
Using an astronomical timer or a Wi-Fi smart transformer lets the controller track your exact GPS coordinates. The system calculates local sunset and sunrise times every single day of the year, turning your lights on at dusk and adjusting automatically for Daylight Saving Time without you ever touching a dial.
Dividing your yard into independent lighting zones unlocks practical everyday convenience and energy savings:
- Curb-Appeal Front Yard Zone: Keeps architectural uplights and driveway bollards running at 100 percent brightness from sunset until 11:00 PM when guests are arriving.
- Backyard Patio Entertaining Zone: Links pergola lights, outdoor kitchen task lights, and audio visual equipment so you can dim the patio from your smartphone during a backyard movie night.
- Perimeter Security Zone: Drops pathway and side-yard fixtures down to 30 percent brightness after midnight, or links them to motion sensors that snap to full brightness if someone enters the yard before sunrise.
If you love hosting holidays or gameday watch parties, RGBW tunable color-changing LEDs let you switch from a classic 2700K warm white everyday look to festive colors using a phone app or voice control. While standalone DIY plug-in smart modules handle basic on-off scheduling well, custom-integrated architectural control systems like Lutron, Control4, or Savant take outdoor living to another level. Integrating your exterior transformers into a whole-home system lets you press a single Goodnight keypad button by your bed that locks your doors, arms your security cameras, lowers the shades, and shifts your landscape lighting into overnight mode.
Bring Your Low Voltage Landscape Lighting Vision to Life
Combining thoughtful three-layer fixture placement, inviting 2700K to 3000K color temperatures, and properly sized 12V wiring transforms a dark property into a safe, welcoming extension of your home. Whether you want to highlight specimen trees, light up an outdoor kitchen, or tie your yard into a smart home automation system, getting the hardware right from day one pays off for decades. Visit Bjorn's showroom today to explore commercial-grade outdoor fixtures and speak with our local system design specialists. Our experienced team provides personalized layout planning, custom smart home integration, and professional installation that big-box retailers simply cannot match.
Frequently Asked Questions About Low Voltage Landscape Lighting
Low voltage landscape lighting wire should be buried at least 6 inches deep in turf and garden beds using a flat-blade spade to protect it from aerators and edging tools. When routing cable beneath driveways or concrete walkways, run the wire inside a rigid PVC conduit sleeve buried 6 to 12 inches deep.
To calculate the right transformer size for your landscape lights, add up the total wattage of all your planned fixtures and multiply that sum by 1.25 to follow the 80 percent safe capacity rule. For example, a lighting layout drawing 100 total watts requires at least a 150-watt transformer to prevent thermal overload and allow for future yard expansion.
Low voltage pathway lights should be spaced 8 to 12 feet apart in a staggered pattern on alternating sides of the walkway. Staggering the fixtures prevents a harsh airport runway look while providing gentle, overlapping pools of light for safe footing.
The best Kelvin color temperature for residential landscape lighting is 2700K to 3000K warm white. This range produces a natural, inviting glow that flatters green foliage, wood decks, and stone facades without creating harsh blue glare.
You prevent voltage drop in a 12V outdoor lighting system by using thick 12/2 or 10/2 AWG direct-burial copper wire paired with a multi-tap transformer and a center-fed T-method or hub wiring layout. Connecting longer wire runs to a 14V or 15V terminal tap compensates for line resistance so distant LED fixtures stay just as bright as nearby lights.
Low voltage landscape lighting integrates easily with smart home automation by using Wi-Fi smart transformers, astronomical timers, or relay modules compatible with platforms like Lutron, Control4, and Savant. This setup lets you control independent yard zones, dim patio lights, and trigger outdoor security scenes directly from your smartphone or wall keypads.
Why Trust Bjorn’s?
Choosing a partner for residential or commercial solutions is about more than just equipment; it's about expertise and long-term support. As a second-generation, family-owned San Antonio business, Bjorn's has built its reputation on a foundation of trust. Unlike a typical retail store, we are one of the few dealers in the country that specializes in both high-end equipment sales and the complex design and installation of full-scale, custom audio-video systems. This comprehensive expertise ensures your project is designed to perform flawlessly from the ground up.
Our commitment to you doesn't end when the installation is complete. One of the most significant reasons our customers trust us is our extensive, in-house service department. While other stores may send you to an uninterested third party for help, we believe in servicing what we sell. We treat our customers like friends and family, and if you ever have a problem, we want to be the ones to take care of it. That is our commitment to managing your "electronic lifestyle" for years to come.